Getting Started with WordPress hosting
Introduction to WordPress
Thank you for choosing LCN WordPress hosting as the home for your new website!
To get started you’ll need to check your LCN account email address – this is where we’ll send your setup email.
On this email you’ll find your WordPress username, a temporary password, and a link to the login page.
Just follow that link and login.
As per the setup emails instructions, you’ll need to immediately change your password to something safe and secure, to reduce the likelihood of your website being hacked.
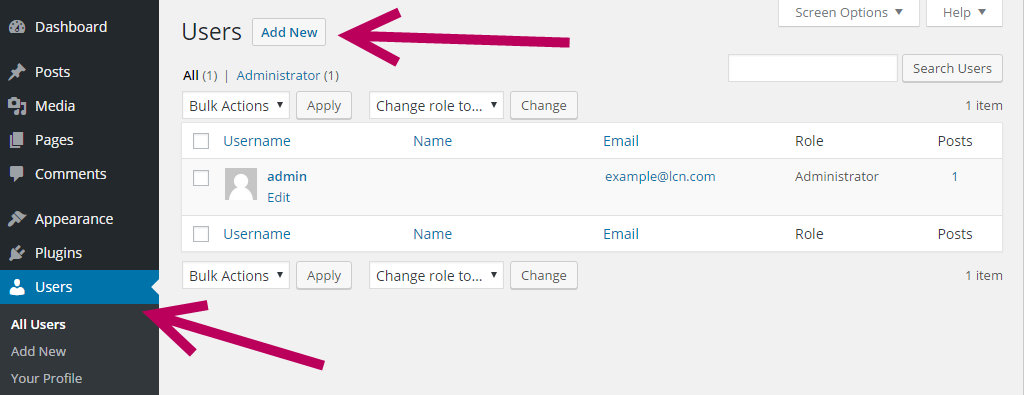
Find the “Users” section on the left hand column of your dashboard. There should be only one user in there called “admin” – that’s you!
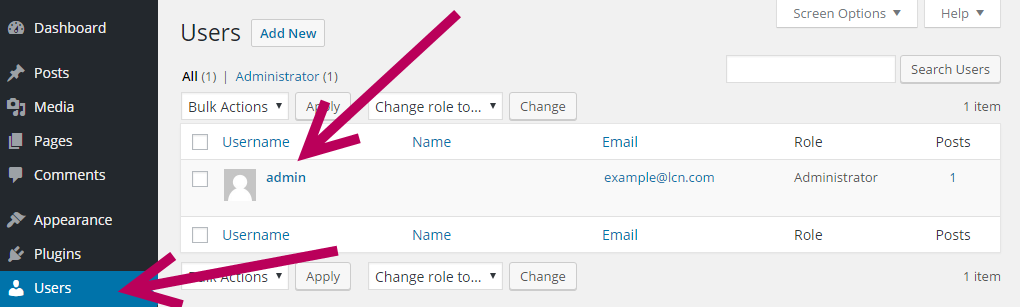
Click on “admin” and you’ll be able to generate a password on the next page. You can either choose to use this generated password (recommended), or just overwrite the password with one of your choice.
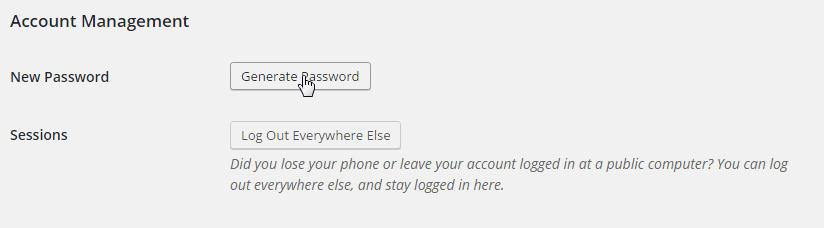
Confirm by scrolling to the bottom of the page and hitting the blue “Update Profile” button.
When you first gaze upon the WordPress dashboard you might wonder what you’re supposed to focus on first, as there are plenty of different options and settings pages to get to grips with.
However, for the most part you won’t need to know these areas inside out to get started.
Let’s go over the key ones you need to know…
Dashboard
The dashboard is the very first screen you’ll see when login into your admin area of your WordPress site.
Here you can get an at-a-glance overview of your site. Information here will include news about available updates, allow you to see your draft posts, and check out any recent comments your readers have left.
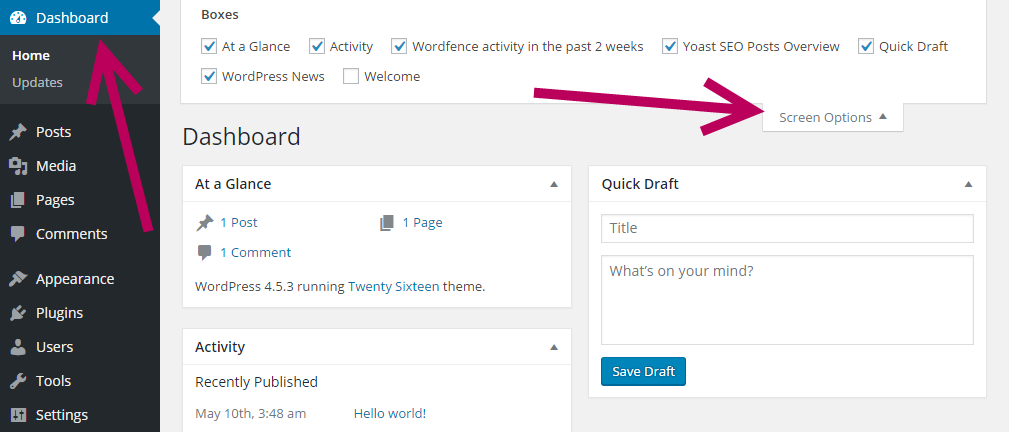
You can also customise what appears on your dashboard by hitting the “Screen options” button towards the top right. From here you can select or deselect different information boxes.
Posts
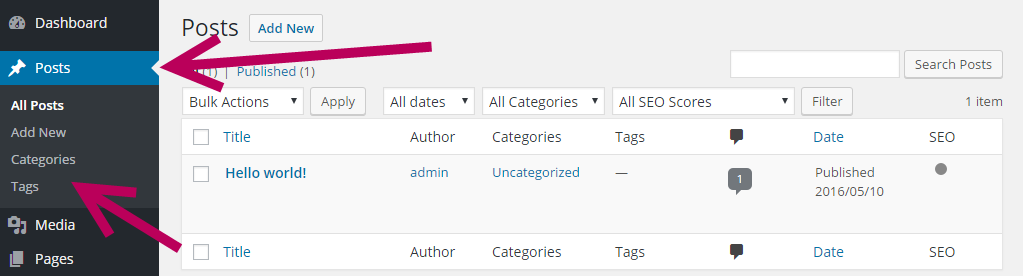
Here’s the place to go when you want to add, edit or delete your blog posts. Within the “Posts” section you can also create and manage your categories and tags.
Posts, categories and tags are explained further in our guide on Posts and pages.
Media
Within this section you’ll find any media (pictures, videos, recordings) you’ve uploaded to your WordPress site – these uploads would typically take place as your create a post or page, like when you add an image or embed a video.
You can upload new media, delete existing media, or edit it.
Pages
Unlike “posts”, pages are static pages on your website. So instead of being date stamped, with an author and comments section like a blog post, pages tend to be used for static content such as “about us”, “product”, “services”, or “contact us” pages.
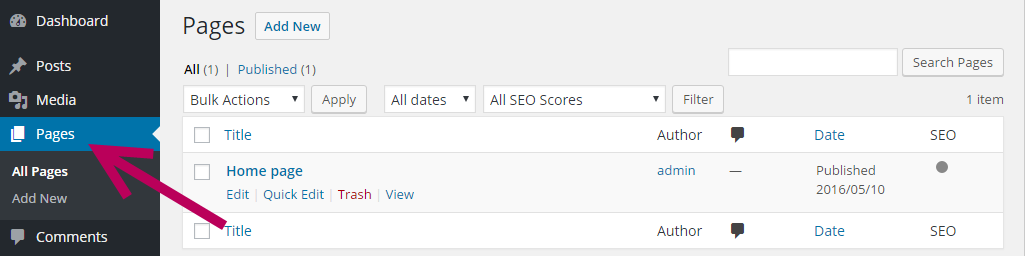
From the “Pages” section you can add, delete, or edit pages.
Comments
At its heart, WordPress is a blogging platform. As blogs rely on user interactions, the ‘Comments’ section is how you manage and moderate the comments people leave on your blog pages.
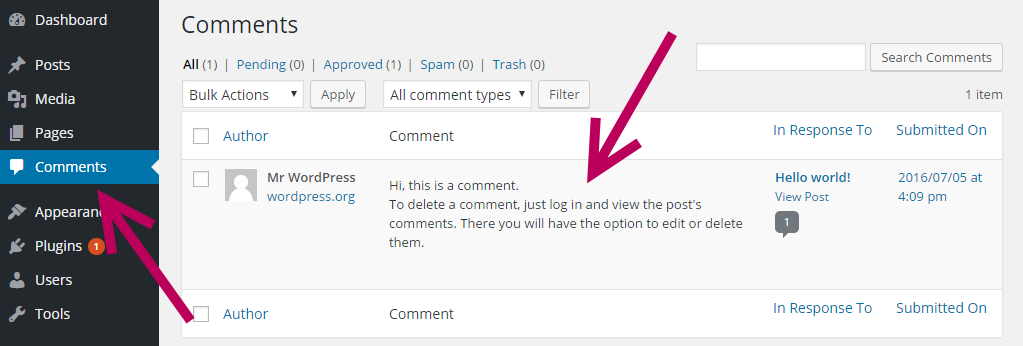
You can also reply to comments directly from this section, as well as mark any abusive or inappropriate comments as spam. If your blog becomes busy you can expect to visit this section frequently.
Appearance
This is where the design magic happens. “Appearance” includes access to your themes, and the different management / customisable areas.
A WordPress theme in simple terms is a new “skin” for your WordPress site – a different design. There are thousands of different themes available online and switching between them is kind of like changing clothes.
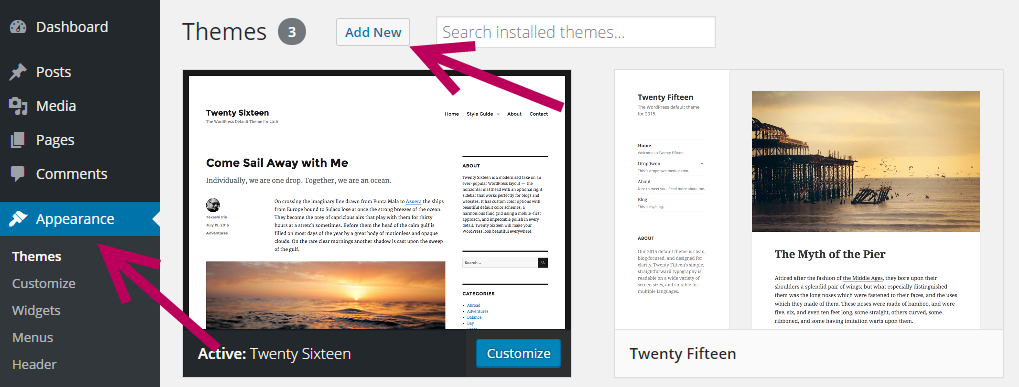
Within the “Appearance” section you can also customise your chosen theme, arrange the widgets for your theme, and add menus.
We’ll go into more details on themes and editing them on the Themes guide section of this guide.
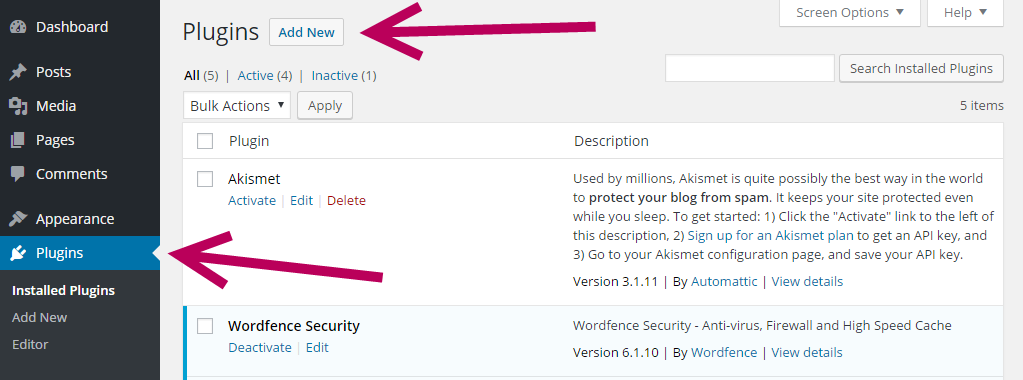
Plugins
Plugins really are one of the best features of WordPress. They allow you to extend the functionality beyond what WordPress already offers. Best of all, you usually don’t have to get involved in any code.
Examples of what plugins can do include…
- Add a contact form to your site so you can accept enquiries from potential customers
- Protect your site from hackers to keep your content safe and website online
- Create backups of your site in case disaster strikes and you ever need to revert to a previous version
- Add a gallery on your posts/pages to showcase your products or services
Basically, if you want to add almost any functionality to your site, there’s usually a plugin that can do it effortlessly for you – and quite often for free too.
From the “Plugins” section you can search for new plugins, or edit, activate or deactivate old ones.
We’ll go into plugins in more detail in our Plugins guide.
Users
Users are anyone that logs in to your WordPress admin area (dashboard). In the vast majority of cases these users will be the people that update and manage your WordPress site.
So this will probably include you (as the administrator) and maybe one or two others who contribute to your posts and pages.
Here you can update user details, such as passwords and social media accounts, as well as add and delete users.
Settings
“Settings” is an area you’ll need to familiarise yourself with right from the beginning.
“Settings” contains all the important setup details you’ll need to configure to set your site up how you want it. Let’s go through some of the subsections…
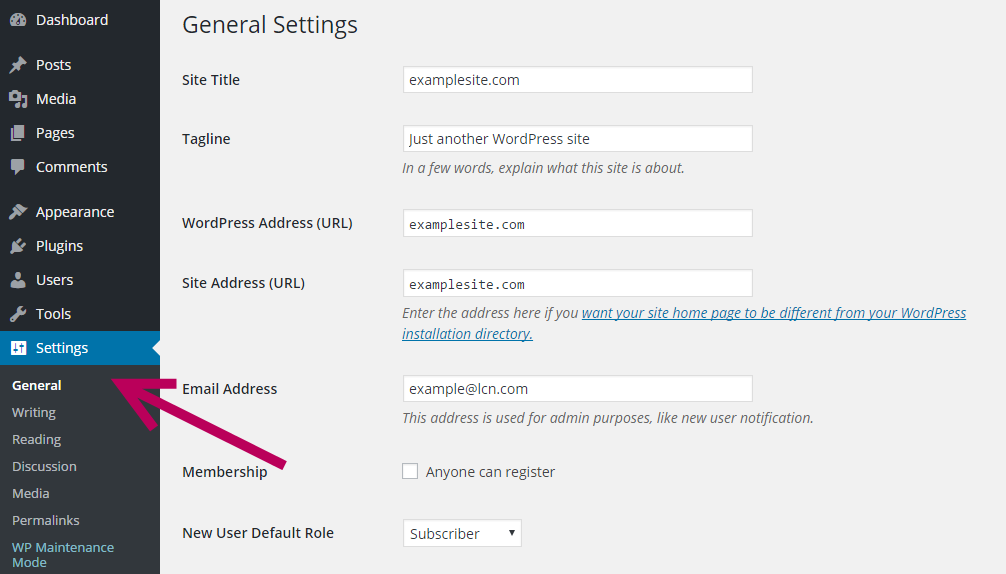
General
From “General” you can name your site, set the site URL, the site email address and timezone/date format.
Writing
Your day-to-day blog writing settings are here, including your default post category and post formats.
Reading
This page is particularly important because it allows you to control what page your “front/homepage” shows. Do you want your frontpage to show your blog articles? Or a static page that you’ve created, like a standard homepage.
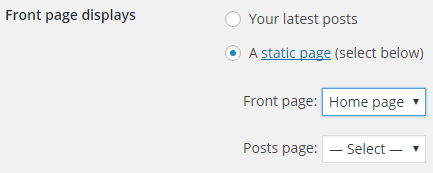
If you choose “Your latest posts”, then a list of your most recent blog articles will appear as your home page. Tick “A static page” and you’ll have the option to select a pre-existing page to be your frontpage.
Discussion
Discussion refers to comments and links back to your site.
From here you can manage various aspects including if/how you get notified of new comments, how comments are displayed, and comment moderation settings. Unless you have a specific want or need, the default settings are usually fine here.
Media
Define your image size settings from this section. Select your image thumbnail size, and medium and large size files. These sizes will be used by default when creating new posts and pages.
Permalinks
This is the other super-important area of the settings panel. In short, from here you can define how your WordPress site URLs will look.
By default WordPress URLs look pretty ugly. Usually a fresh WordPress install might show a post URL looking like…
- http://yoursite.com/?p=02 (“02” is the page ID number)
This isn’t particular pretty or memorable, so we recommend you have your permalinks look more like this…
- http://yoursite.com/about-us
Your WordPress hosting is automatically configured to set permalinks like this (Post name). However, you can change this setting easily enough in the “Common Settings” section of the “Permalinks” page, as shown below.
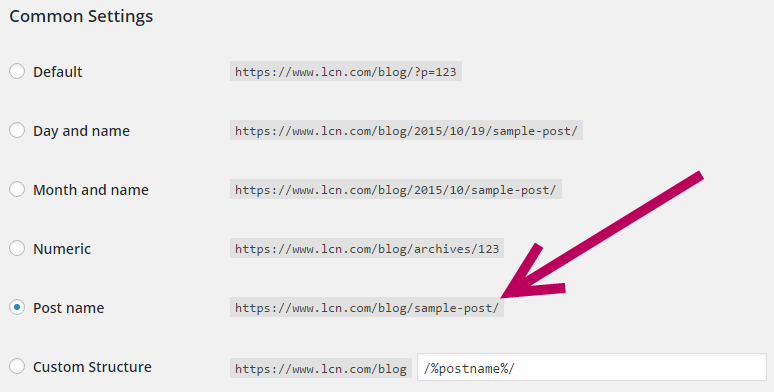
Not only is this easier to remember, it’s also more search engine friendly, since there is usually a reference to what the page content is about, in the URL structure.
You can find more on creating a custom URL structure here.
And that’s a wrap! You now know all the WordPress basics you’ll need to get started.