How to install and activate WordPress plugins
Installing and activating a WordPress plugin
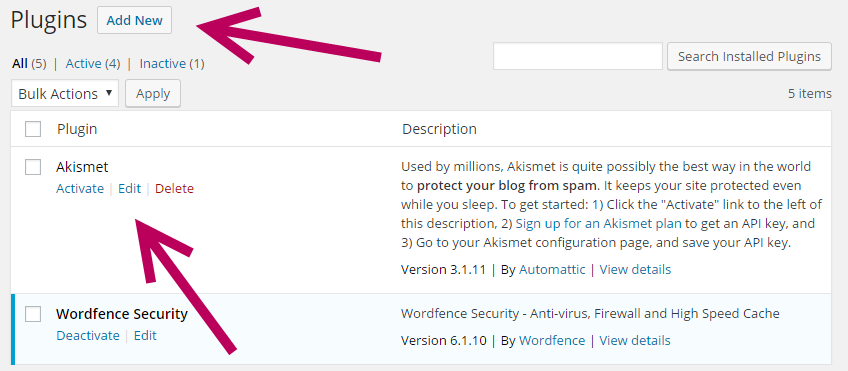
Installing or adding a plugin is very similar to adding a theme. Just look for the “Plugins” link on your WordPress dashboard. From here you‘ll see a list of plugins you already have installed – here you can activate/deactivate, amend the settings, or delete a plugin.
Also on this page, towards the top, you’ll see the “Add New” button.
Upon clicking “Add new” you’ll be directed to a page where you can add a new plugin in two different ways…
- Add a plugin from the official WordPress Directory
On this page you’ll see a list of plugins from the official WordPress Directory, which you can view by “Featured”, “Popular” and “Recommended” filters. If you can’t find what you’re looking within these filters, you can simple search for a suitable plugin via the “Search Plugins” box.
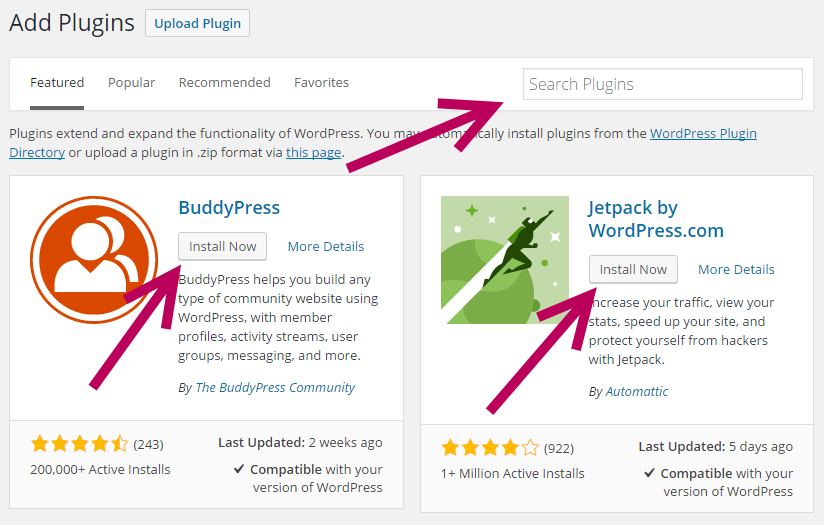
When you find the plugin you’re after, just hit the “Install Now” button.
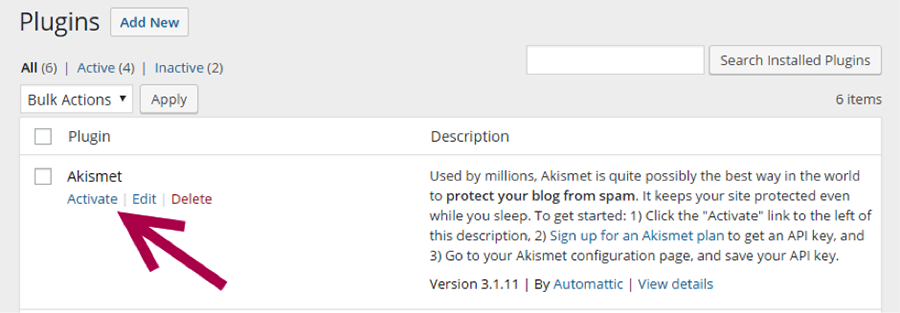
Your plugin will automatically install in a few seconds, at which point you’ll need to revisit the “Plugins” overview page to activate – remember, just because a plugin is installed, it doesn’t mean it’s active.
- Upload a plugin
If you’ve bought a premium plugin, or just downloaded one you’ve found online (after confirming it’s safe of course!), you can upload a plugin manually.
When you download any plugin to your computer, it will be in a .zip file format.
To upload this plugin, simply navigate to the “Add New” area of the “Plugins” section of your dashboard and then click the “Upload Plugin” button (near the top of the page).

From here, select the “choose file” button to select your plugin (.zip file on your computer) and then hit the “Install Now” button. Job done!
Remember, you can manage your plugins (deactivate, delete and adjusting individual plugin settings) at any time via the “Plugins” section of your dashboard.
Whilst some plugin settings can be found in this area, others create their own separate administration areas that can be found in the left hand side dashboard menu (this is entirely up to the plugin developer).
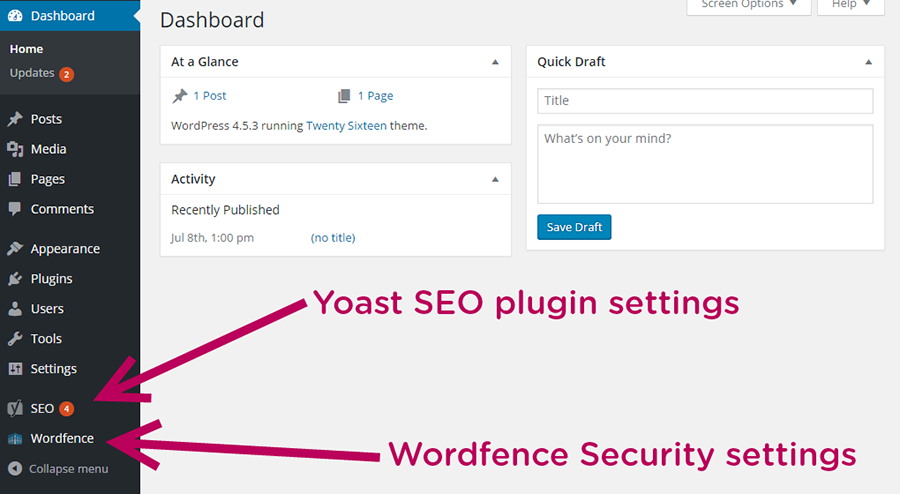
As the example above shows, these two particular plugins can be managed directly via their own respective links within the dashboard menu.
Don’t install too many!
A site with 20+ plugins all working at the same time is likely to significantly slow down your page load times – a disaster for your visitors who probably won’t hang around waiting for slow pages to load.
Keep plugins under 20 if possible, or just only use what plugins you really need. Don’t have active plugins waiting around that aren’t be use, as not only could they slow down your site, they could also end up being hacked if you’re not keeping them up to date.
That’s it! You now know how to install and activate WordPress plugins.