How to add and test a WordPress theme
Adding and testing a new WordPress theme
So after much careful consideration, you’ve found a theme that’s right for you and your new website. Let’s get it uploaded to your WordPress site so we can test it out.
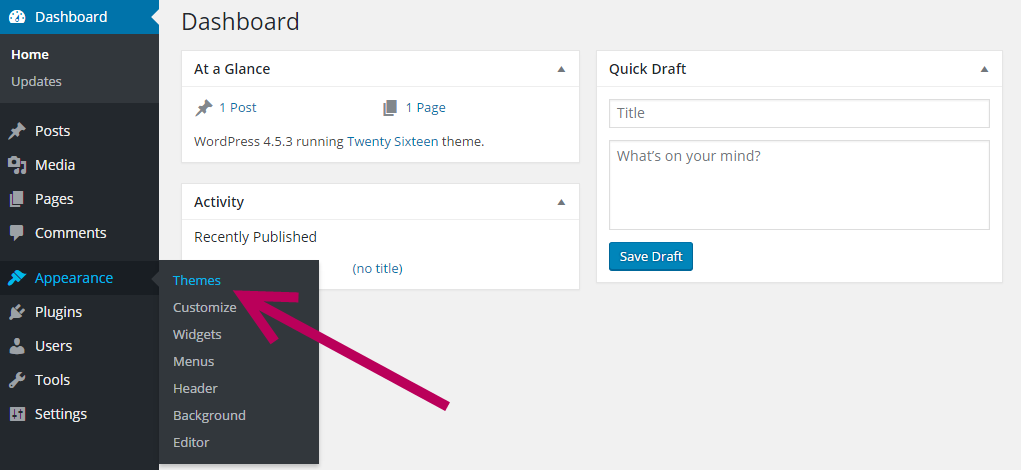
Login to your WordPress dashboard and look for “Appearance” and then “Themes”.
You’ll then be presented with a page displaying what themes you’ve already installed on your WordPress site. To add a new theme, just click the “Add New” button at the top.

You then have two options…
- Add an official WordPress Theme Directory theme
On the “Add Themes” page you’ll be presented with a list of themes from the official WordPress Theme Directory. You can also view the “Featured”, “Popular” and “Latest” themes available.
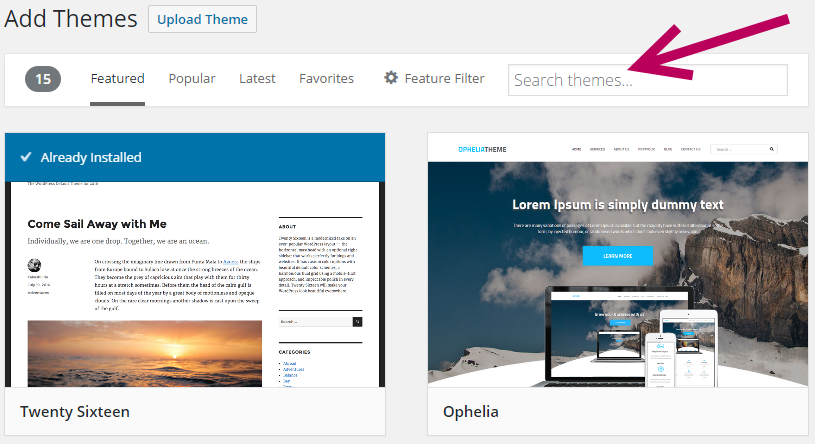
You can also use the search box (as the image above shows) to find any particular theme you either already know the name of, or to find one using any particular keywords (such as “responsive”, “modern”, “single column”.
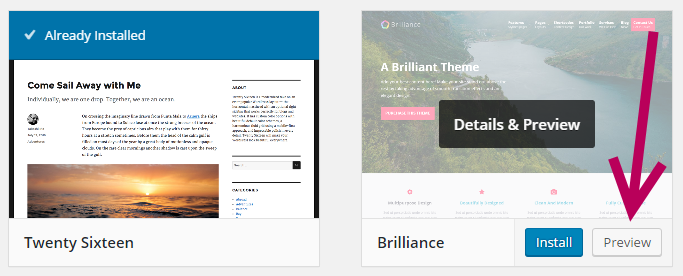
Hover over any theme you like the look of and you’ll see a “Preview” option. Hit this button, and it will take you to a preview of what your site would look like using that particular theme.
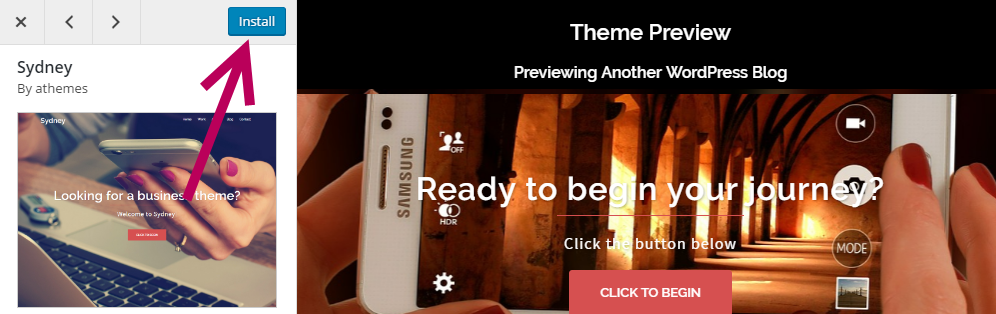
If you like it, you can hit “Install” to install it to your WordPress site.
- Upload a theme
To upload your own theme, such as a premium theme you have purchased from elsewhere, just look for the “Upload Theme” button on the “Add Themes” page.

Any theme you download should come as a .zip file. This is the format required by WordPress in order to properly install your theme.
Hit “Choose file” and locate the theme .zip file on your computer and select the “Open” button.
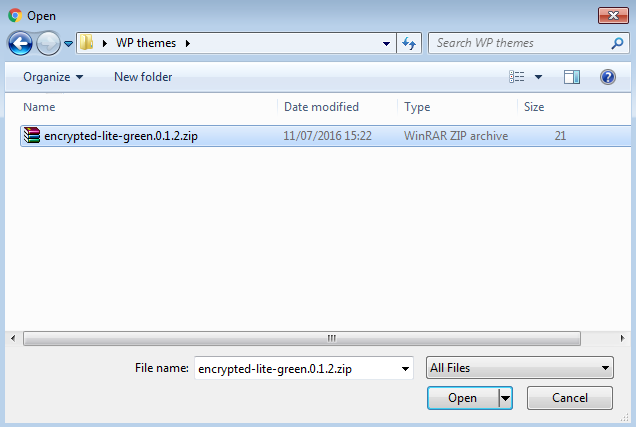
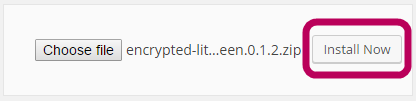
Then hit “Install Now”.
It’s important to note that when a theme is installed, it doesn’t mean that it’s activated (active on your WordPress site for the world to see). It simply means it’s installed and you can choose to activate it when you wish.
When previewing, bear in mind that themes often need customising to fit your layout.
Preview and activate your new theme
Now your theme is installed, you can activate it from the “Themes” section of your WordPress dashboard.
Just hover over the theme and two options will appear: “Activate” and “Live Preview”.
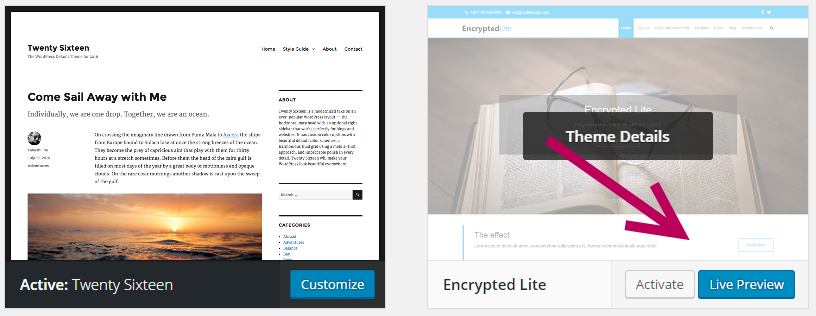
Live Preview will do just that – give you a preview of what your site will look like with this theme activated, without displaying it to your website visitors.
Select “Activate” to set the theme live.
You’ll now be taken to the “Customize” page.
Customising your theme
Every WordPress theme allows various degrees of customisation. This utterly depends on the functionality the creator of the theme has built in.
Some themes allow you to completely change the design from top to bottom – such as choosing colour schemes, layouts, other functionality, fonts etc.
Other themes are far more limiting, which has good and bad points. A theme with limited customisation options means the design can’t be messed-up by someone who isn’t exactly sure of what they’re doing. The obvious bad point is that you don’t have as much control over how it looks.
After installing your theme you’ll be taken to the “Customize” page. Alternatively, you can find it at any time under the “Appearance” > “Customize” section of your WordPress dashboard.
The “Customize” page is split into two distinct sections.
To the left you have your options and controls for adjusting and customising your theme.
On the right, you’ll see a preview of your theme design, which will change to reflect any custom changes you make.
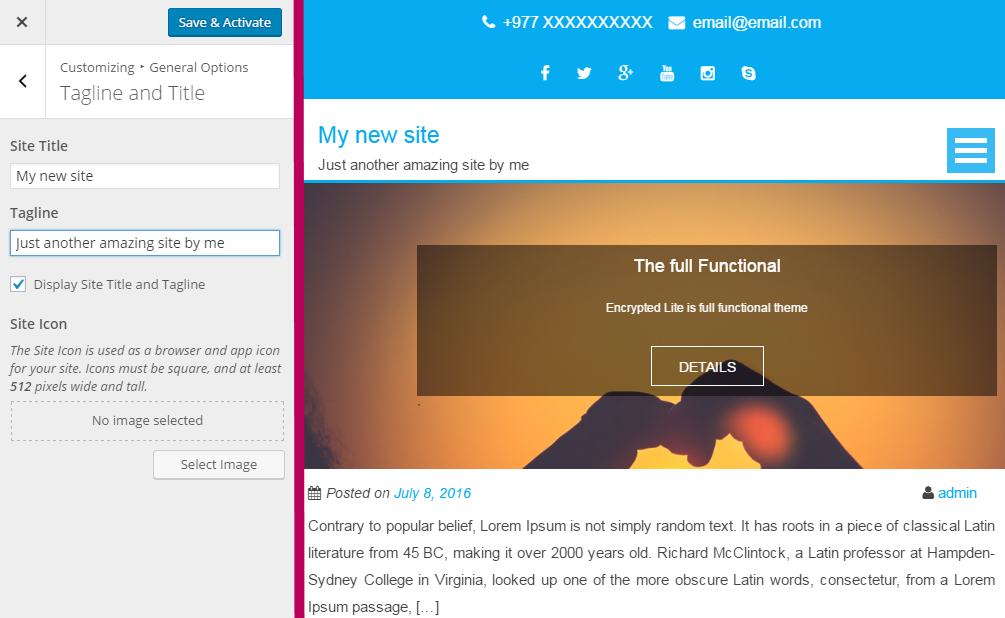
Customising options (left) – Design preview (right)
Again, what you can customise in here is entirely down to the theme you are using. Some themes will give you more options than others.
However, almost all themes allow you to easily change/add…
- Site/company logo
- Header/title text (The main title of your site, usually displayed on the homepage)
- Background image
- Site tagline (usually displayed under your site title)
- Site icon (favicon)
- Navigation menus
- Widgets (explained further in the next section)
- Colours / colour scheme
As you make changes you’ll see the theme preview update on the panel to the right.
Remember, none of these changes are live and active until you hit the “Save & Activate” button at the top of the customise menu, so don’t be afraid to get your hands dirty here and have a play with your theme to get it just right.
Once you hit “Activate”, your new WordPress theme will be added to your site for the world to see.