How to rotate and crop images in InstantSite
Please note: This guide is for legacy InstantSite pruchsed before the 18th August 2020. If you have our new InstantSite please see guides specific for our new builder found here.
The InstantSite editor includes image editing functions allowing you to rotate and crop images after inserting images to pages within your site. This guide is designed to show LCN InstantSite customers how to rotate and crop uploaded images in the InstantSite editor.
Let’s get started…
Rotating Images
If you need to change the orientation of an image you can rotate the image after inserting it to a page within your site.
To rotate an image:
- Click on the image that you need to rotate within the editor.
- Click the image settings icon:

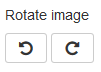
- Then just use the rotate image buttons to rotate the image either left or right:
- The image container will automatically update to match the new orientation of the image. You can then re-size the image container if needed by using the square re-size box at the right edge of the image container.
Cropping Images
If you need to crop an image after inserting it to a page, this can be done within the Instantsite editor – you can use the crop function to zoom and drag the required area of an image within the image container:
- Click on the image that you need to adjust within the editor.
- Click the crop image icon:

- The + and – buttons can then be used to zoom in and out of the image and you can drag the image to display the required area using the mouse cursor. Select the reset icon if you need to reset the image to its original state.

- The image will automatically fill the size of the image container, you can re-size the image container if needed by using the square re-size box at the right edge of the image container.
.hkb-article__content.entry-content img { margin: auto auto; }