How to set up your email account in Windows Live Mail
This guide will explain how to set up your email address in Windows Live Mail for customers using LCN Web hosting, WordPress hosting, Email hosting or LiteMail with an Authenticated SMTP.
Before you get started, you’ll need to have your email address and password handy. If you can’t remember these details, you can check and reset them from your LCN account.
You will also need to ensure you have Authenticated SMTP enabled. You can find out how to do this here.
Let’s get started…
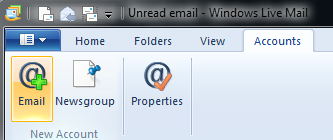
- Open Windows Live Mail and click the Accounts tab.
- Click Email.
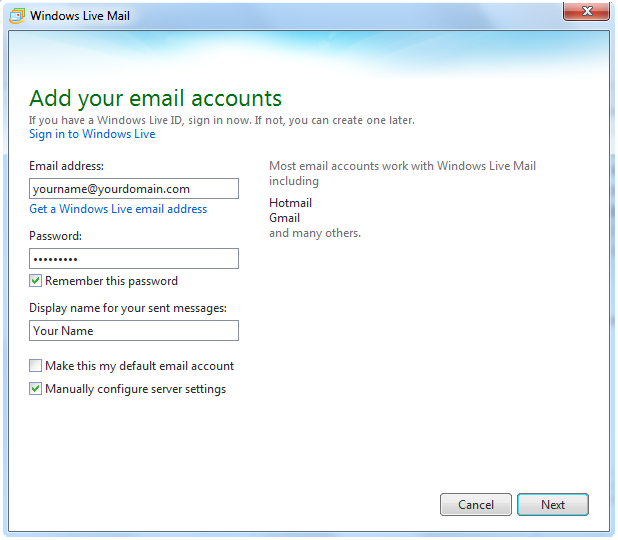
- Enter your Email address, Password and Display name. Check the Manually configure server settings box and click Next.
- The Configure server settings screen should appear.
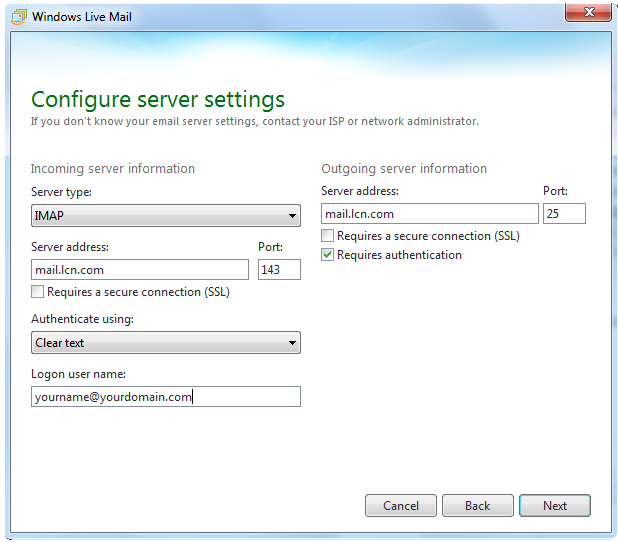
- In the left column (Incoming server information) – you’ll need to enter the following information:
- Enter mail.lcn.com in the Server address field.
- Enter 143 in the Port field.
- Remove any tick from the Requires a secure connection (SSL) box.
- Ensure Authenticate using is set to Clear text.
- Enter your full e-mail address in to the Logon user name field.
- In the right column (Outgoing server information) – you’ll need to:
- Enter mail.lcn.com into the Server address field.
- Check the Requires authentication box.
- Enter 25 in the Port field.
- Click Next.
Please Note: Depending on your internet service provider, the default port of 25 should allow you to send e-mail. If you find that you’re having problems sending mail, the first step would be to change the port to 26 or 587 under the Outgoing server information.
That’s it! You’ve set up your email account in Windows Live Mail. If you have any trouble setting up your email addresses, please don’t hesitate to get in touch.