How to set up your email account in the Windows 10 Mail app
This guide explains how to set up your email address in the default Windows 10 Mail app. For customers using LCN web hosting, WordPress hosting, Email hosting or LiteMail with an Authenticated SMTP.
Before you get started, you’ll need to have your email address and password handy. If you can’t remember these details, you can check and reset them from your LCN account.
You will also need to ensure you have Authenticated SMTP enabled. You can find out how to do this here.
Let’s get started…
How to add a new account
- Open the Mail app.
- Select Add account from the welcome page. If you’ve already added other accounts to the Mail app previous, go to the settings option at the bottom left of the navigation pane, select Settings > Manage Accounts > Add account.
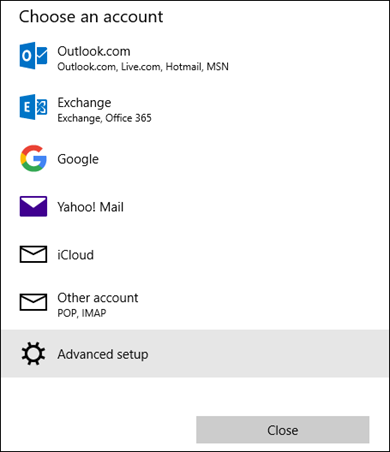
- Select Advanced setup
Please Note: You may need to scroll down the list of supported account types to see this option
- Select Internet email as the account type, then enter the following details to add your account:
- Email Address: Enter your full email address
- Username: Enter your full email address
- Password: Enter your mailbox password
- Account name: This is the name you’ll see for the account within the Mail app and under the ‘Manage Accounts’ menu
- Send your messages using this name: Enter the display name that you want recipients to see when they receive email from your account.
- Incoming mail server: mail.lcn.com
- Account type: Choose POP3 or IMAP4.
- Outgoing (SMTP) email server: mail.lcn.com
- The following tick-boxes should be enabled automatically:
- Outgoing server required authentication.
- Use the same username and password for sending mail. If you have a unique password for SMTP untick this and enter the correct details.
- Require SSL for incoming mail.
- Require SSL for outgoing mail.
- Once completed, select Sign in and Done.
That’s it! You’ve successfully set up an account on the Windows 10 Mail app. you’re now ready to send and receive emails.