How to add an additional email alias to a user in Microsoft 365
In this article, we will show you how to add an additional email alias to a user in your Microsoft 365 Admin area. Adding an alias to an existing user allows them to receive emails to multiple addresses without needing a separate mailbox.
Getting Started
To get started, you first need to log into your Microsoft Admin area located at https://login.microsoftonline.com/ with your Admin username and password.
TIP: Unsure where to find your Admin details? If so, please refer to our support guide HERE.
Step One
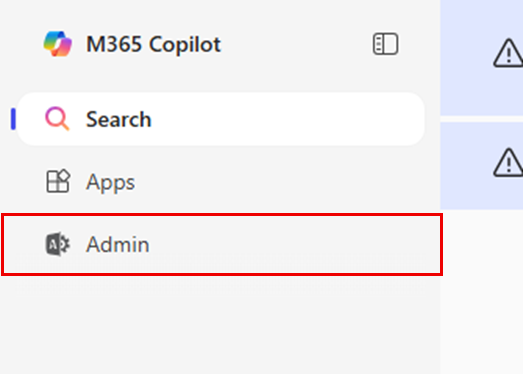
To begin, select Admin from the menu column on the left-hand side of the page.
Step Two
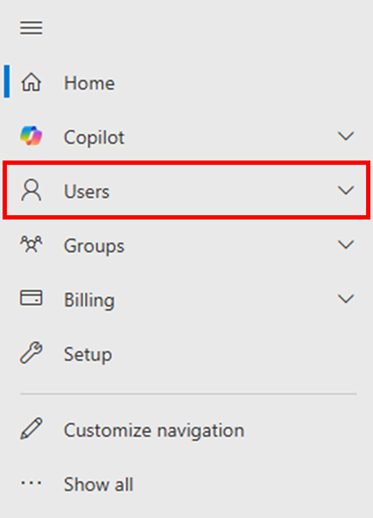
Select Users from the menu column on the left-hand side of the page.
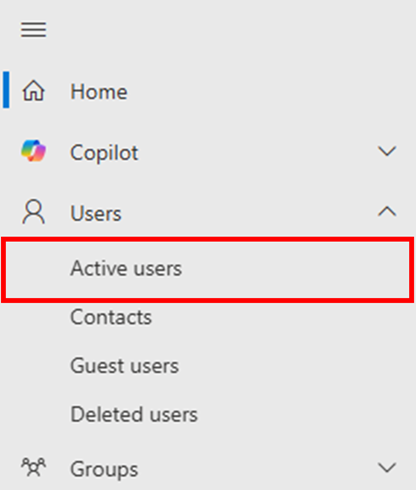
Once you have selected Users, select Active users.
Step Three
On the Active users page, select the display name of the user that you wish to add an alias to.
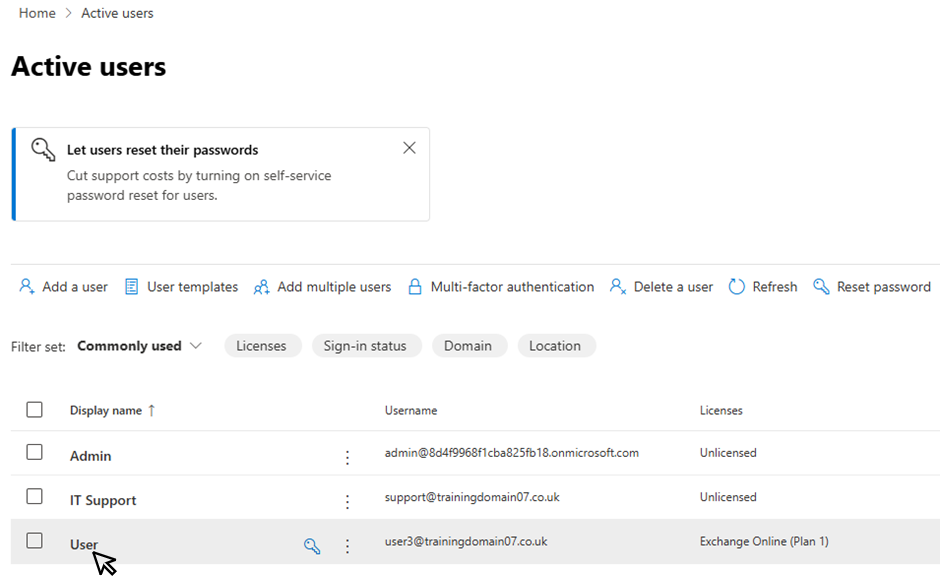
NOTE: You can only configure multiple aliases on a user that has a license assigned to them.
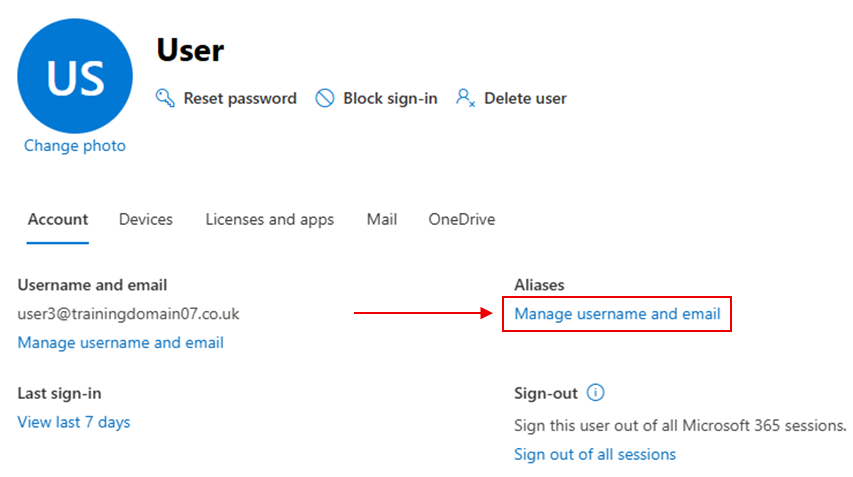
Step Four
In the panel that appears on the right hand side of the page, select Manage username and email.
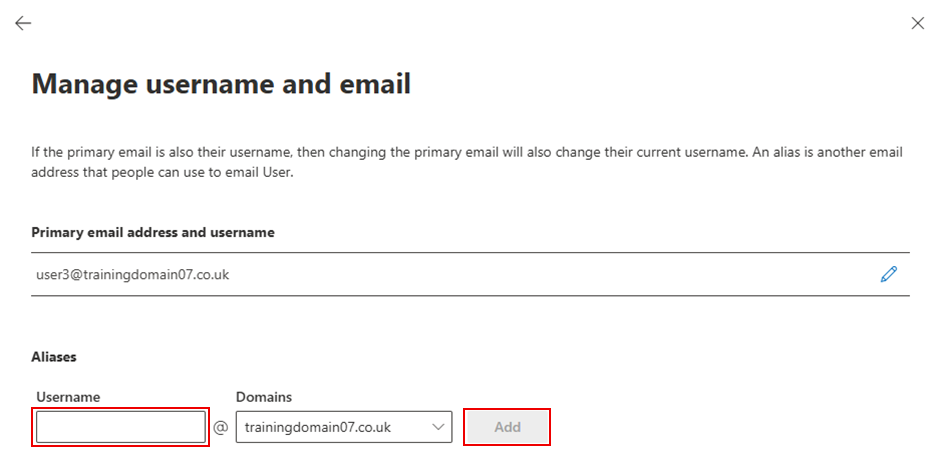
Step Five
In the Manage username and email section, add the required alias in the Username field and then select Add.
Once this action has completed, you can add further aliases as required by repeating this step.
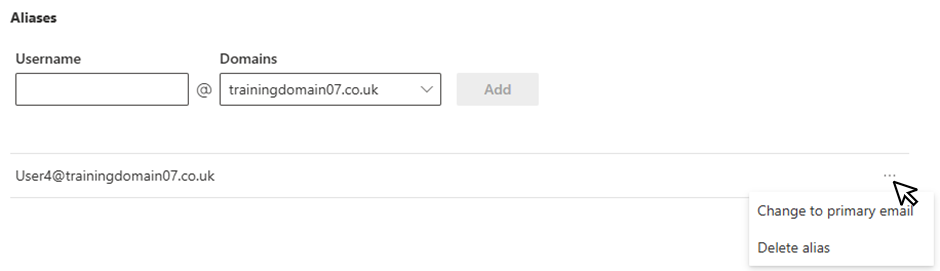
TIP: For more options, click the three dots on the right of the created alias to either Change to primary email or to Delete alias.
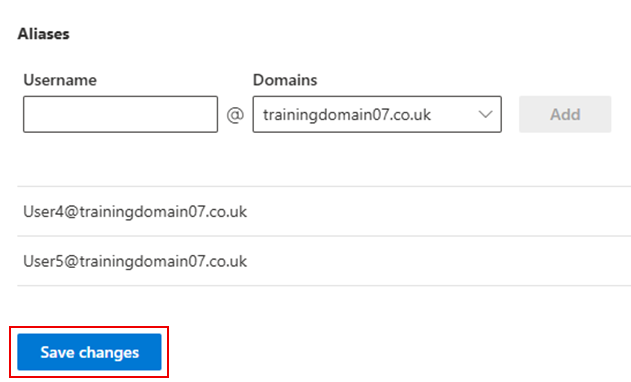
Step Six
Once you have added the required alias(es), select Save changes to finalise the configuration.
If you have any further questions, simply raise a support request from within your Online Control Panel or call us on 0345 363 3637. Our Support team are here to help and ready to assist you with your enquiry.
For assistance raising a support request please follow the following guide.