Setting up your PureSSD VPS
Your new PureSSD VPS is a self-managed Virtual Private Server that allows you free rein over how you manage your Operating System. You’ll have full admin privileges, so you can configure to the environment that you need.
If you would prefer a managed VPS where monitoring, backups and recovery are included if purchased, then we take care of your services so you can place your focus on running your business.
Step 1
Once your order has been processed, your VPS be built through our automated service. This can take a few minutes and you will be emailed once this has been completed.
Step 2
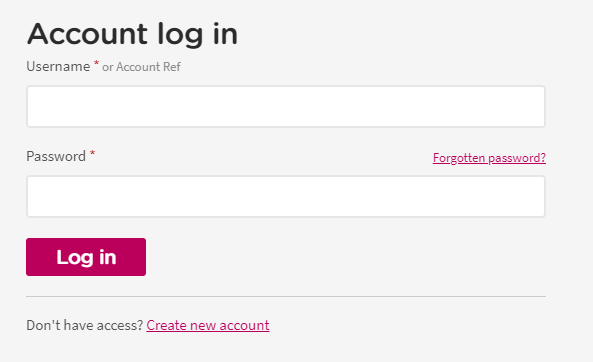
Setting up your PureSSD VPS – First, log into your Online Control Panel.
Step 3
Enter your username and password for your LCN account.
Step 4
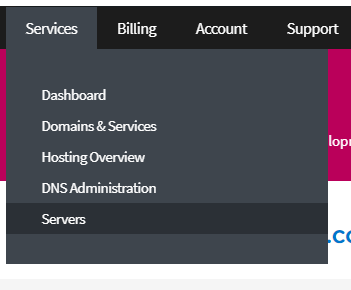
Once you are logged in, hover over the Services tab and click on ‘Servers‘.
Step 5
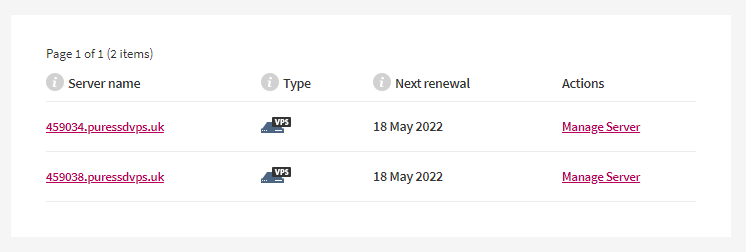
Select your server from the next screen.
Step 6
You should now see the details for your server listed on this page.
Step 7
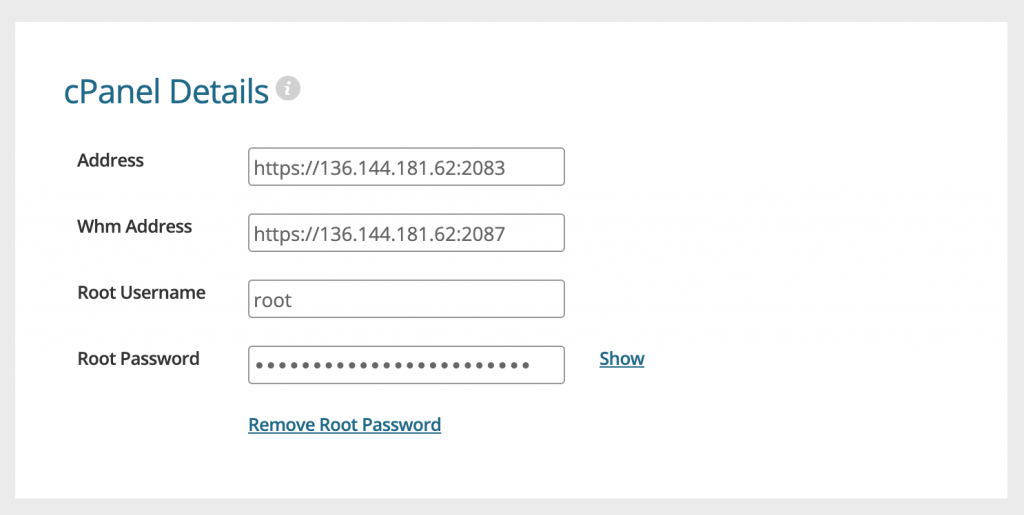
From here, you can see your server login credentials and the IP assigned to the server. You can connect via the above as you wish as you will have the root login details.
Step 8
If you selected cPanel or Plesk during your purchase, then you will see the following:
Plesk:
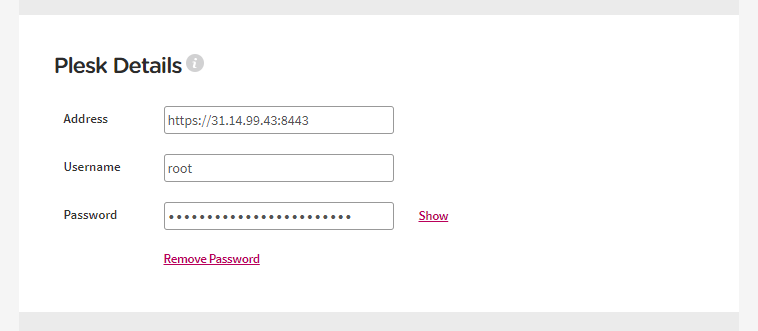
In your web browser, go to https://your.ip.address:8443 which will display your Plesk login page. e.g.: https://136.144.168.239:8443
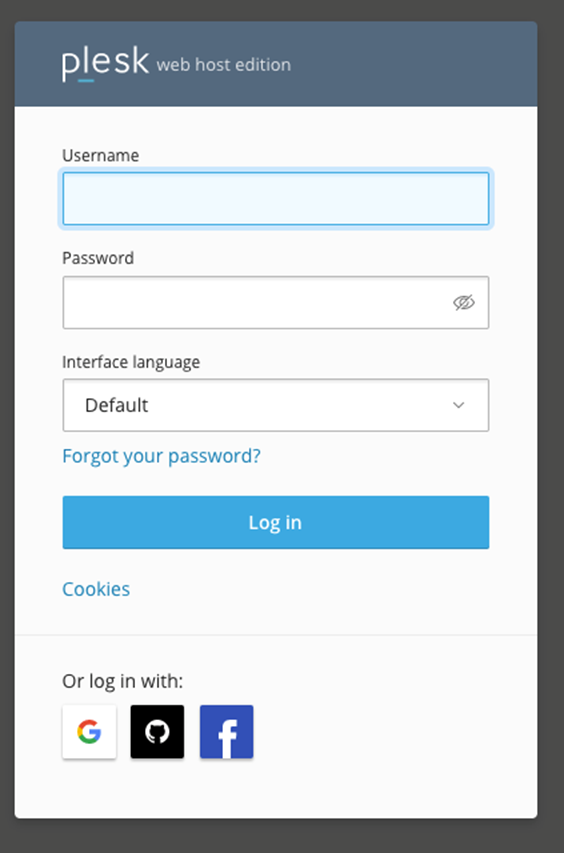
Enter root as your username and your password as stated in your control panel.
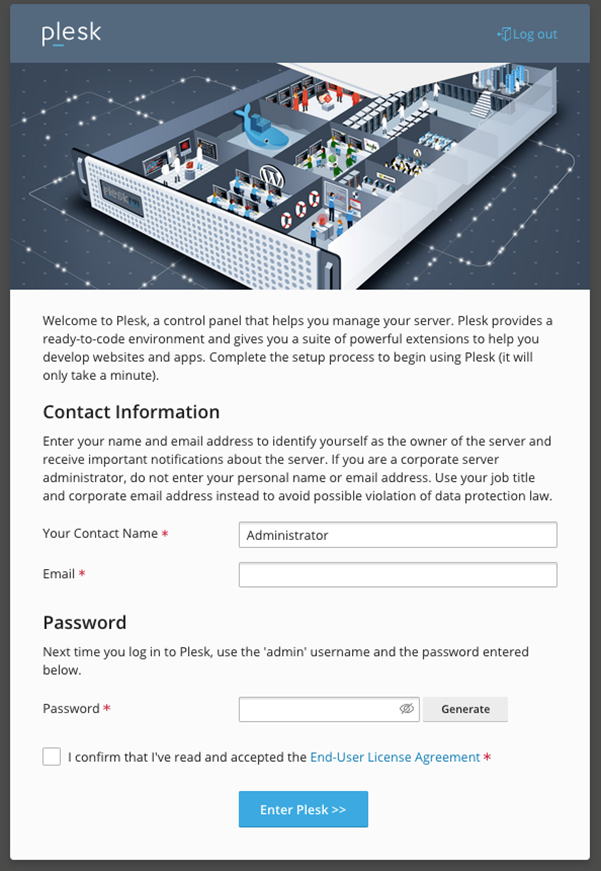
You will then see the following page, which prompts you to update your contact details and password:
Once this step has been completed, you will see the Plesk welcome page:
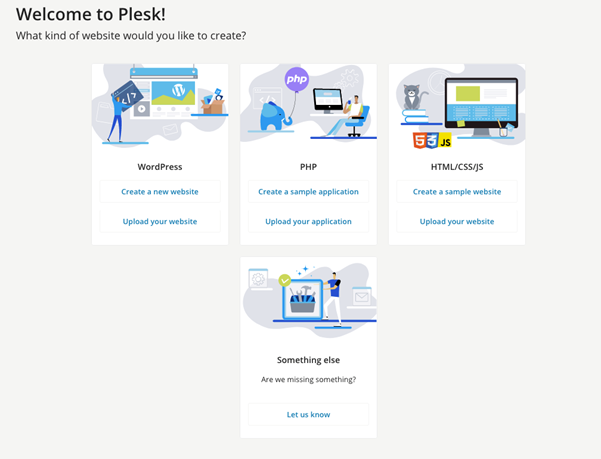
And your PureSSD VPS is ready to use.
cPanel:
In your web browser, go to https://your.ip.address:2087 which will display your cPanel login page. e.g.: https://136.144.181.62:2087
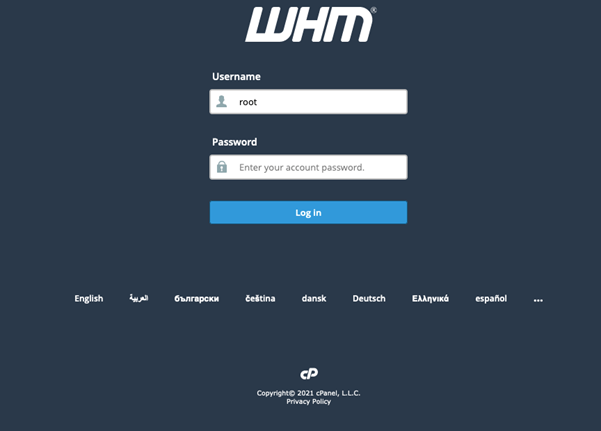
Enter root as your username and your password as stated in your control panel.
You will need to agree to the End User Licence agreement before your cPanel portal will load as shown below:
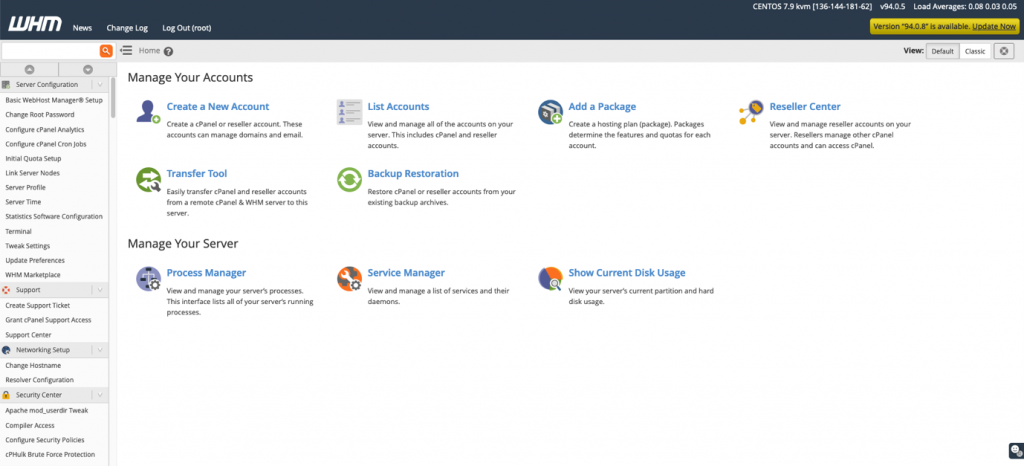
Your PureSSD VPS is now ready for you to use.