
As you begin to optimise your website for search engines, it won’t be long before you come across the robots.txt file. It may only be a tiny text file, but the data in there can have a huge effect on your website and its visibility in the search engine result pages.
Terms like ‘Robots Exclusion Protocol‘ may sound like sound something out of a fiction movie, but all will become clear once you’ve read this article.
What is Robots.txt?
Search engines use web crawlers to scan the Internet to find content. These crawlers are also known as spiders and bots. The Robots.txt (Robots exclusion standard) file tells these crawlers (and other user agents) which pages and elements of a site to crawl and index.
In simple terms robots.txt files can be used to help crawlers identify and index pages on your website. The Robots.txt file can also be used for managing security and server performance.
Creating your Robots.txt
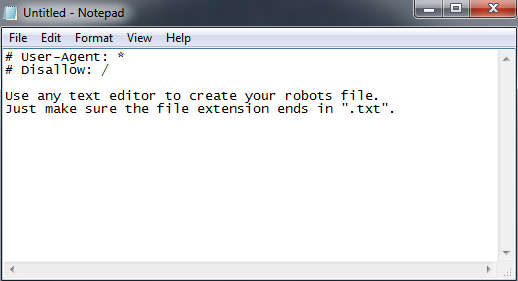
As the name suggests, a Robots.txt is simply a .TXT file that can be created using popular text editors such as Notepad on Windows, or TextEdit on Mac.
Your Robots.txt file always should be placed in your websites root directory, as this is the only place crawlers will look for it. For example, http://yoursite.com/robots.txt is a valid location.
If your site is built using WordPress, a robots.txt file is created when you start publishing content. You can then control what crawlers will look at under the Privacy Settings section in your WordPress Admin. There are also a number of WordPress plugin such as Yoast SEO, which offers similar functions and controls to robots.txt files.
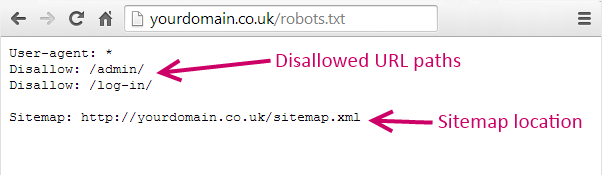
The first element of a robots.txt file gives instructions as to which web crawlers the command refers to. In some cases, you may want to restrict access to some crawlers but allow others to crawl and index your content.
The second element of the file uses “Disallow” statements to tell a crawler where it can and can’t look for new pages to index.
Disallow command
The following command allows crawlers from all search engines full access to every page of your site.
User-agent: *
Disallow:
If you want to block the entire site from all crawlers, the command becomes
User-agent: *
Disallow: /
The forward slash indicates that everything within the root directory of your website should be blocked from the crawlers.
This command becomes very useful when you want to only block certain areas of your site.
For example, you may not want the crawlers to index an admin login page or a checkout page (as these are not desired landing pages to your website via search engines). In which case, the command would be like so….
User-agent: *
Disallow: /log-in/
Disallow: /checkout/
All you need to do is just add the relevant path to that page on a new line after “Disallow:“.
It’s important to be aware that search engines could still access your site in other ways if you use the command above. For example, an anchor text link to your site could mean crawlers will still find it.
Confidential content should always be saved in a password-protected file to prevent unwanted visitors from finding it.
Restricting specific crawlers/user agents
The robots.txt file can also be used for blocking specific crawlers and user agents. You may wish to block Google from indexing your site; for example, if your website is under construction.
The following command can be used to restrict specific web crawlers from accessing your content –
User-agent: BadCrawler
Disallow: /
Replacing ‘BadCrawler’ with the name of the crawlers you want to exclude allows you to block them. You can also restrict crawlers from accessing specific directories on your site, like this –
User-agent: BadCrawler
Disallow: /private/
Meta robots
Another way to prevent web crawlers from indexing your content is to use the meta robot tag. Unlike the Disallow tag (which goes in your robots.txt file), the meta robots tag is placed into the section of your web page.
The following line of code means that content should not be indexed by any crawlers.
<meta name="robots" content="noindex">
To reiterate, this tag must be added alongside your other meta tags in the header of your code (the tag).
No guarantees…
The robots.txt is a protocol all crawlers (other user agents) should follow – should being the operative word here.
There are many malicious spam crawlers out there crawling content daily, and these crawlers are likely to completely ignore your robots.txt file and it’s commands. So keep in mind that the robots.txt is not a complete failsafe when looking to hide your website’s content.
Similarly, remember your robots.txt file is publicly available, which means anyone can see what sections and paths your website you wish to block.
Utilise Google Webmaster Tools
Google’s Webmaster Tools offers a quick and easy way to check if your robots.txt file and its commands working as you intended.
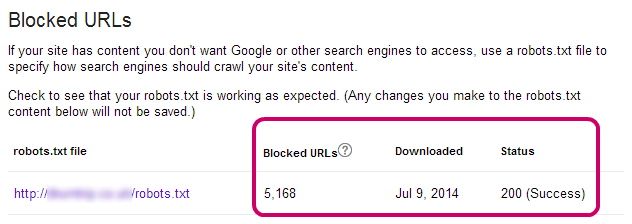
The Test Robots.txt tool tests that the commands you have submitted are correctly formatted and working.
It’s also worth using the tool to check if content you do want to appear isn’t being blocked unintentionally.
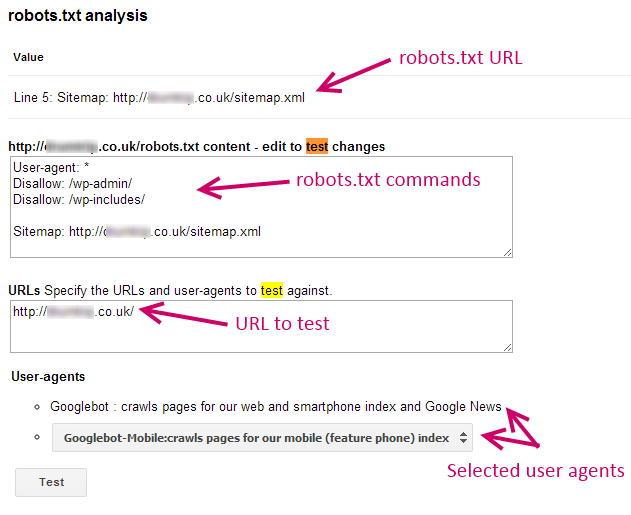
It’s important to understand that the Test Robots.txt tool only provides results for Google user-agents, and other crawlers may respond differently to your robots.txt commands.
Get the right web hosting for your website! Check out our hosting plans and get online today. Have a question? Contact our friendly UK-based support team.
Your say
If you have any questions on how to use the robots.txt, or when to use a meta robots command, please let us know in the comments below 🙂